Create Poll Screen
Overview
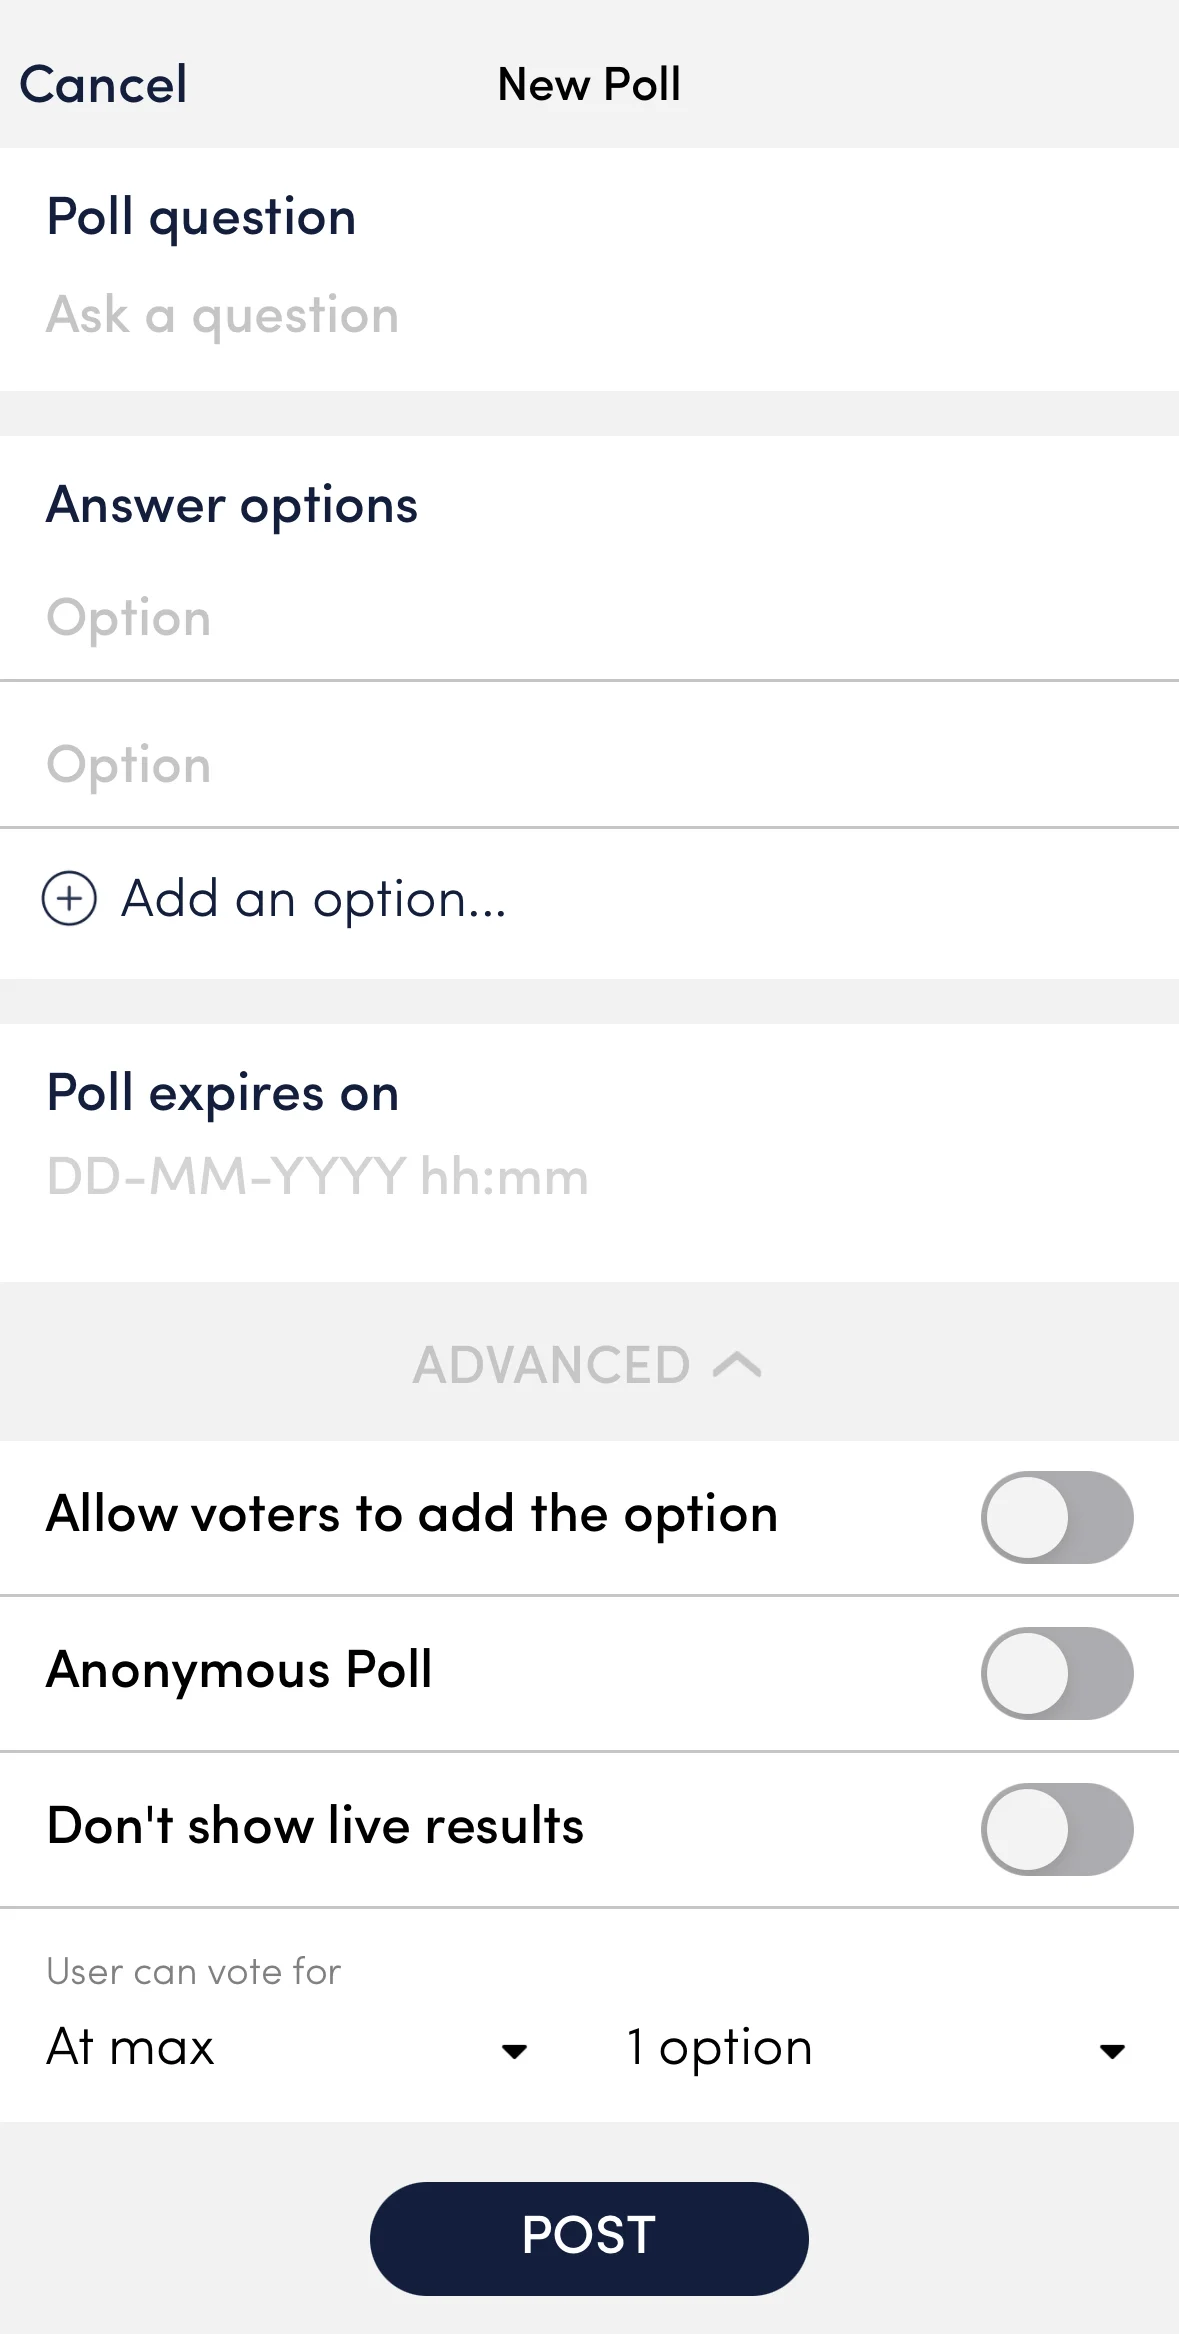
The CreatePollScreen component is responsible for rendering the UI that allows users to create a poll within a chatroom or conversation. It provides input fields for entering poll options, a question, and other related configurations. This component manages the state of the poll creation process and ensures that the input data is validated before submission. It also supports customization of styles and integrates with the broader chat system for submission and interaction.
GitHub File:
UI Components
Props
Interaction Callbacks
onPollExpiryTimeClicked: Triggered when the poll expiry time is clicked.onAddOptionClicked: Triggered when the option to add a new poll option is clicked.onPollOptionCleared: Triggered when a poll option is cleared. Provides the index of the cleared option.onPollCompleteClicked: Triggered when the complete poll button is clicked.
Styling Customisation
The CreatePollScreen can be customised using the pollStyles.
Usage Example
Step 1: Create Custom Screen
- In your app, create a
CustomCreatePollScreenfile and pass all your customisations as props. - Create
createPollStylefor customisation and call thesetCreatePollStylesto set the customisation.
import {
  CreatePollScreen,
  useCreatePollContext,
  STYLES,
} from "@likeminds.community/chat-rn-core";
import React from "react";

const CustomCreatePollScreen = () => {
  const { showDatePicker, addNewOption, removeAnOption, postPoll } =
    useCreatePollContext();

  // customised showDatePicker callback
  const onPollExpiryTimeClicked = () => {
    console.log("do something before onPollExpiryTimeClicked");
    showDatePicker();
    console.log("do something after onPollExpiryTimeClicked");
  };

  // customised addNewOption callback
  const onAddOptionClicked = () => {
    console.log("do something before onAddOptionClicked");
    addNewOption();
    console.log("do something after onAddOptionClicked");
  };

  // Customise UI styling
  const createPollStyle = {
    pollExpiryTimeStyle: {
      marginBottom: 10,
    },
    pollAdvancedOptionTextStyle: {
      fontSize: 16,
    },
    pollAdvanceOptionsSwitchThumbColor: "green",
    pollAdvanceOptionsSwitchTrackColor: "lightgreen",
  };

  if (createPollStyle) {
    STYLES.setCreatePollStyles(createPollStyle);
  }

  return (
    <CreatePollScreen
      onPollExpiryTimeClicked={onPollExpiryTimeClicked}
      onAddOptionClicked={onAddOptionClicked}
    />
  );
};

export default CustomCreatePollScreen;
Step 2: Wrap your screen with Context Provider
import { CreatePollContextProvider } from "@likeminds.community/chat-rn-core";
import CustomCreatePollScreen from "<<path_to_CustomCreatePollScreen.tsx>>";

const CreatePollScreenWrapper = ({ navigation, route }) => {
  return (
    <CreatePollContextProvider navigation={navigation} route={route}>
      <CustomCreatePollScreen />
    </CreatePollContextProvider>
  );
};

export default CreatePollScreenWrapper;
Step 3: Add the Custom Screen in App.tsx
- In your
App.tsx, create aStack.Navigatorin theNavigationContainerwrapped byLMOverlayProvider. - Add
CreatePollScreenWrapperas a Stack screen in yourNavigationContainer.
App.tsx
import { LMOverlayProvider, STYLES, Themes } from "@likeminds.community/chat-rn-core";
import { CREATE_POLL_SCREEN } from "@likeminds.community/chat-rn-core/constants/screenNames";
import CreatePollScreenWrapper from "<<path_to_CreatePollScreenWrapper.tsx>>";
import { NavigationContainer } from "@react-navigation/native";
import { createNativeStackNavigator } from "@react-navigation/native-stack";

export const App = () => {
  const Stack = createNativeStackNavigator();

  return (
    <LMOverlayProvider
      myClient={myClient} // pass in the LMChatClient created
      apiKey={apiKey} // pass in the API Key generated
      userName={userName} // pass in the logged-in user's name
      userUniqueId={userUniqueID} // pass in the logged-in user's uuid
      theme={<"SDK_THEME">} // pass the sdk theme based on the Themes enum
    >
      <NavigationContainer ref={navigationRef} independent={true}>
        <Stack.Navigator screenOptions={{ headerShown: false }}>
          <Stack.Screen
            name={CREATE_POLL_SCREEN}
            component={CreatePollScreenWrapper}
          />
        </Stack.Navigator>
      </NavigationContainer>
    </LMOverlayProvider>
  );
};