Posts List View
Overview
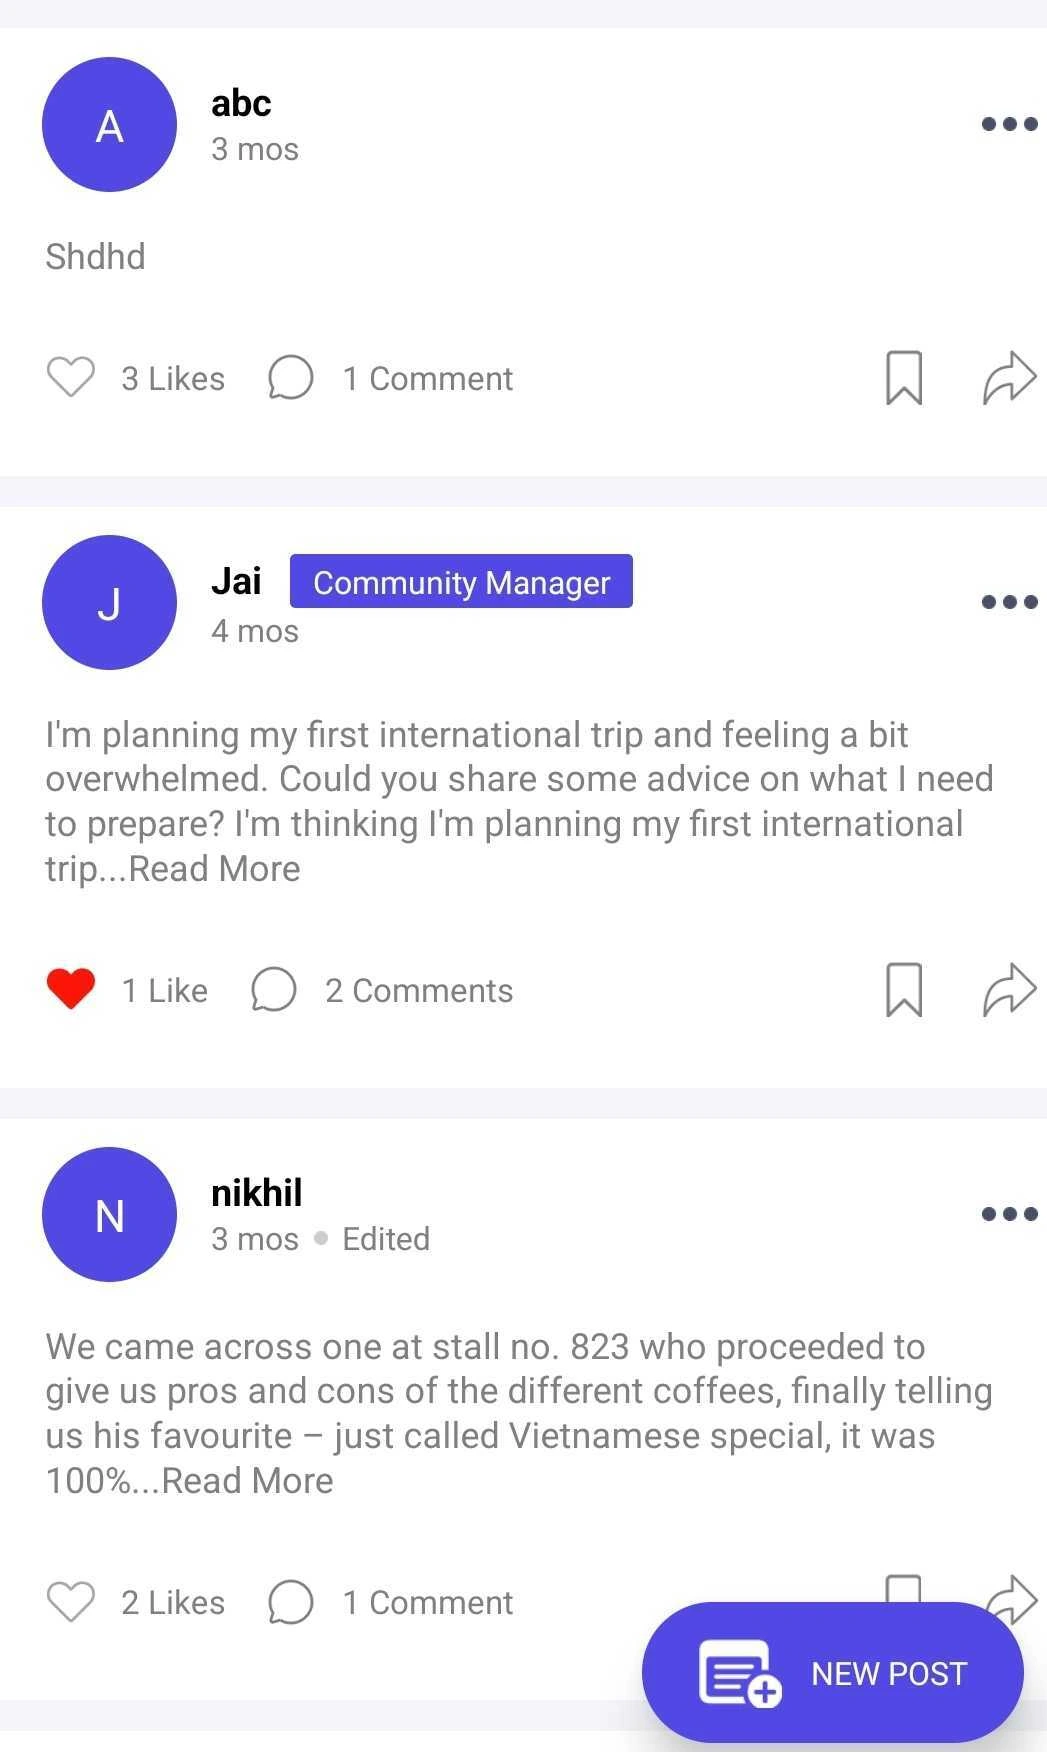
The PostsList component is responsible for rendering a list of posts in a feed. It handles the display of individual post items and provides support for infinite scrolling, ensuring smooth loading of new content as the user navigates through the feed. The component integrates with post content, media, header, and footer, offering extensive customization options for styling and functionality.
GitHub File:
UI Components
Props
Interaction Callbacks
| Prop Name | Type | Description |
|---|---|---|
postLikeHandlerProp | Function | Triggered when a post is liked. |
savePostHandlerProp | Function | Triggered when a post is saved or unsaved. |
selectPinPostProp | Function | Triggered when a post is pinned or unpinned. |
For more callback details, refer to the callback context source.
Feature Configuration
| Prop Name | Type | Description |
|---|---|---|
items | Array | Array of mapped topics, typically containing topic details like id and name. |
lmPostCustomFooter | React.Component | Custom footer component displayed beneath each post (e.g., for Q&A or comments). |
customWidgetPostView | React.Component | Custom view for widget-based posts, allowing specific widgets or layouts per post. |
Styling Customisations
The STYLES class allows you to customize the appearance of the UniversalFeed. Use STYLES.setPostListStyles to apply these styles.
| Style Key | Type | Description |
|---|---|---|
header | LMFeedHeaderProps | Customization for the post header. |
footer | LMFeedFooterProps | Customization for the post footer. |
postContent | LMFeedPostContentProps | Style for the post content area. |
media | LMFeedMediaProps | Customization for media like images and documents in the post. |
noPostView | ViewStyle | Style for the view when no post is available. |
noPostText | TextStyle | Style for the text displayed when no post is available. |
listStyle | ViewStyle | Style for the entire list container. |
Usage Example
The PostsList screen can be used by wrapping it inside the UniversalFeed screen, and the selected topcis can be passed as a prop to this screen, so that filtered posts are displayed. The customised callbacks for PostsList screen are passed to UniversalFeed screen and are internally accessed by PostsList screen.
Step 1: Create Custom Screen
- Create a
CustomFeedScreenfile and pass all your customisations as props. - Create
postListStylesfor customisation and call thesetPostListStylesto set the customisation.
import { PostsList, UniversalFeed, STYLES } from "@likeminds.community/feed-rn-core";
import { useAppSelector } from "@likeminds.community/feed-rn-core/store/store";


export const CustomFeedScreen = () => {
  const { postLikeHandler, savePostHandler, handleEditPost } =
    usePostListContext();

  // here, mappedTopics are the selected topics according to which the posts will be shown
  const mappedTopics = useAppSelector((state) => state.feed.mappedTopics);

  // customised postLikeHandler method
  const customPostLike = (postId) => {
    console.log("before like ");
    postLikeHandler(postId);
    console.log("after like", postId);
  };

  // customised savePostHandler method
  const customPostSave = (postId, saved) => {
    console.log("before save");
    savePostHandler(postId, saved);
    console.log("after save", postId, saved);
  };

  const postListStyles = {
    header: {
      profilePicture: {
        size: 25,
        fallbackTextBoxStyle: {
          backgroundColor: "red",
        },
      },
    },
    showMemberStateLabel: true,
  };

  // universal feed screen customisation
  if (postListStyles) {
    STYLES.setPostListStyles(postListStyles);
  }

  return (
    <UniversalFeed
      postLikeHandlerProp={(id) => customPostLike(id)}
      savePostHandlerProp={(id, saved) => customPostSave(id, saved)}
    >
      <PostsList items={mappedTopics} />
    </UniversalFeed>
  );
};
Step 2: Wrap your screen with Context Providers
import CustomFeedScreen from "<<path_to_CustomFeedScreen.tsx>>";
import {
  PostListContextProvider,
  UniversalFeedContextProvider,
} from "@likeminds.community/feed-rn-core";

const FeedWrapper = ({ navigation, route }) => {
  return (
    <UniversalFeedContextProvider navigation={navigation} route={route}>
      <PostListContextProvider navigation={navigation} route={route}>
        <CustomFeedScreen />
      </PostListContextProvider>
    </UniversalFeedContextProvider>
  );
};

export default FeedWrapper;
Step 3: Add the Custom Screen in App.tsx
- In your
App.tsx, create aStack.Navigatorin theNavigationContainerwrapped byLMOverlayProvider. - Add
FeedWrapperas a Stack screen in yourNavigationContainer.
import {
  UNIVERSAL_FEED,
  LMOverlayProvider,
} from "@likeminds.community/feed-rn-core";
import { NavigationContainer } from "@react-navigation/native";
import { createNativeStackNavigator } from "@react-navigation/native-stack";
import { FeedWrapper } from "<<path_to_CustomisedUniversalFeed.tsx>>";

export const App = () => {
  const Stack = createNativeStackNavigator();
  return (
    <LMOverlayProvider
      myClient={myClient} // pass in the LMFeedClient created
      apiKey={apiKey} // pass in the API Key generated
      userName={userName} // pass in the logged-in user's name
      userUniqueId={userUniqueID} // pass in the logged-in user's uuid
    >
      <NavigationContainer ref={navigationRef} independent={true}>
        <Stack.Navigator screenOptions={{ headerShown: true }}>
          <Stack.Screen name={UNIVERSAL_FEED} component={FeedWrapper} />
        </Stack.Navigator>
      </NavigationContainer>
    </LMOverlayProvider>
  );
};