In this guide, we will cover the steps to integrate an AI chatbot with LikeMinds Chat SDK, including chatbot setup, managing conversations, and handling AI responses, to create a dynamic, intelligent chat experience in your application.
Step 1: Create an Open AI Assistant on the OpenAI Platform
To begin, you'll need to create an AI Assistant on the OpenAI platform. This assistant will help developers with their queries regarding API and SDK integration for feed and chat products. The assistant will leverage a vector store containing documentation files to provide accurate and contextually relevant responses. Follow these steps to set up the assistant:
Sign Up/Login to OpenAI: Visit OpenAI and sign up for an account or log in if you already have one.
Access API Settings: Navigate to the API section from the dashboard.
Create a New API Key: Generate a new API key for your AI Assistant, which will be used for authentication and interaction with your chatbot. Save this API key for sharing it to LikeMinds via REST-API.
Define Your Model: Select a suitable language model (e.g., GPT-4) for your assistant, based on your use case.
Create Vector Store:
- Go to Vector Stores and create a new vector store.
- Attach Files: Upload all the relevant documentation files (e.g., "LikeMinds Chat Integration" files) to the vector store. This allows the assistant to reference these documents when responding to queries.
Create Assistant:
- Navigate to OpenAI Assistants and create a new assistant.
- Copy the assistant ID for future use
- Add Instructions: In the assistant's configuration, provide the guidelines as per your requirements to ensure it delivers accurate, clear, and concise responses
Here's a sample Assistant Instructions for SDK integration assistant:
 You are an intelligent assistant designed to help developers with their queries around API and SDK integration for feed and chat products. You have access to a comprehensive vector store containing documentation files related to these integrations. Your role is to provide clear, accurate, and concise answers to help developers resolve their issues effectively.

 When responding to queries, consider the following guidelines and constraints:

 - **Understand the Query**: Ensure you fully understand the developer's question before providing an answer.
 - **Leverage Documentation**: Use the vector store documentation to support your responses. Refer directly to specific sections or examples when possible.
 - **Clarity and Precision**: Provide clear and precise instructions or explanations. Avoid ambiguity.
 - **Examples and Code Snippets**: Include relevant examples or code snippets from the documentation to illustrate your points.
 - **Additional Resources**: If applicable, guide the developer to additional resources or sections in the documentation that might be helpful.
 - **Follow-up**: Encourage the developer to ask follow-up questions if they need further clarification.

 ### Constraints:

 - **Accuracy**: Ensure all provided information is accurate and up-to-date with the latest version of the documentation.
 - **Relevance**: Only provide information relevant to the query. Avoid unnecessary details that may confuse the developer.
 - **Security**: Do not share sensitive information such as API keys, passwords, or any proprietary data that is not meant for public consumption.
 - **Privacy**: Do not log or store any personal data of the users asking queries.
 - **Performance**: Respond to queries promptly, ensuring minimal latency between the question and your response.
 - **Format Consistency**: Maintain a consistent format in your responses for readability and ease of understanding. Use proper indentation and syntax highlighting for code snippets.
Connect Vector Store to the Assistant : In the assistant setup, link the vector store you created. This will enable the assistant to access and search through the documentation to provide accurate, context-driven responses.
Test Your Assistant: Use the playground option on the OpenAI platform to test your assistant’s responses, ensuring it correctly uses the uploaded documentation and follows the specified instructions.
Step 2: Create an API Key for LikeMinds SDK
To integrate the LikeMinds Chat SDK with your AI chatbot, you will need to create an API key from the LikeMinds dashboard. This API key will authenticate your application and allow it to access LikeMinds services, including Direct Messaging (DM) features. Follow the steps below to generate your API key and enable DM settings:
Login to LikeMinds Dashboard: Visit the LikeMinds Dashboard, log in with your credentials and create a Project to get the API Key. Save the API Key for all the futures usage in LikeMinds SDK and calling any API.
With this API key, you can now move forward with connecting the LikeMinds SDK to your AI chatbot, allowing your application to manage user interactions and conversations effectively.
Step 3: Add the AI Assistant to LikeMinds Chat
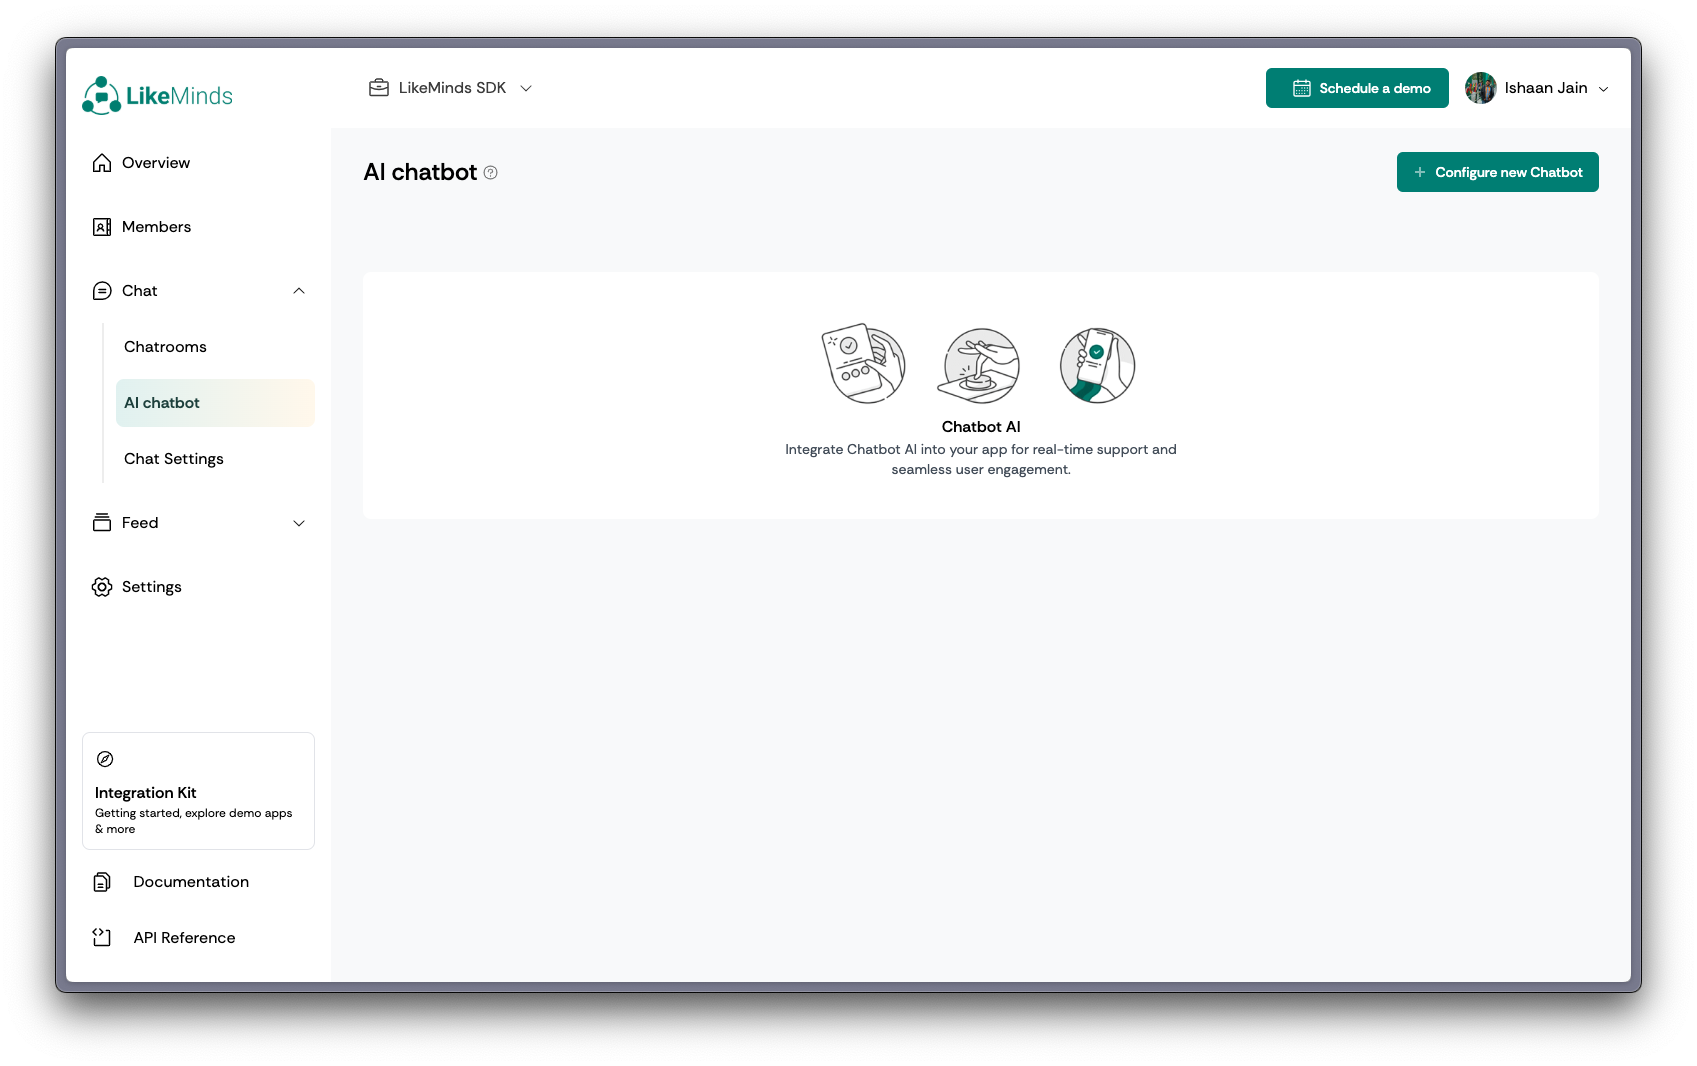
Navigate to AI Chatbot Section: To start integrating your AI Assistant, first go to the AI Chatbot section on the LikeMinds Dashboard.

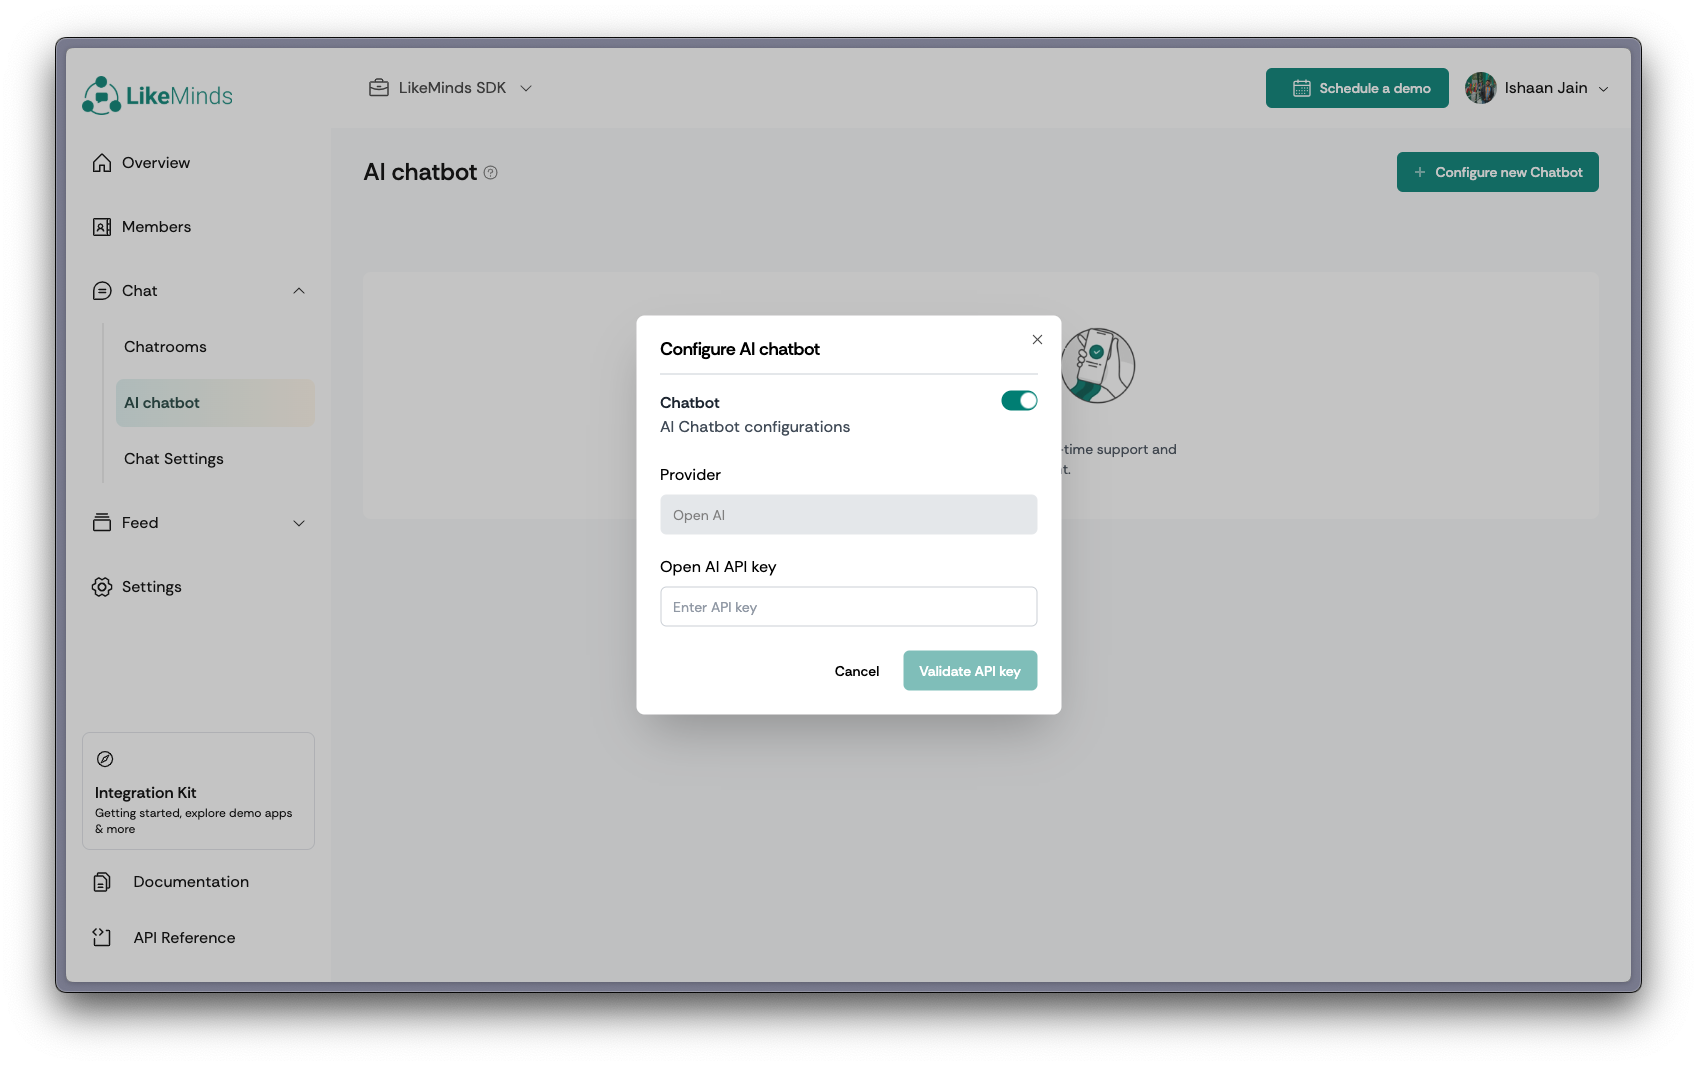
Add Open AI API Key: Next, enter your OpenAI API Key to enable AI functionalities within your chatbot.

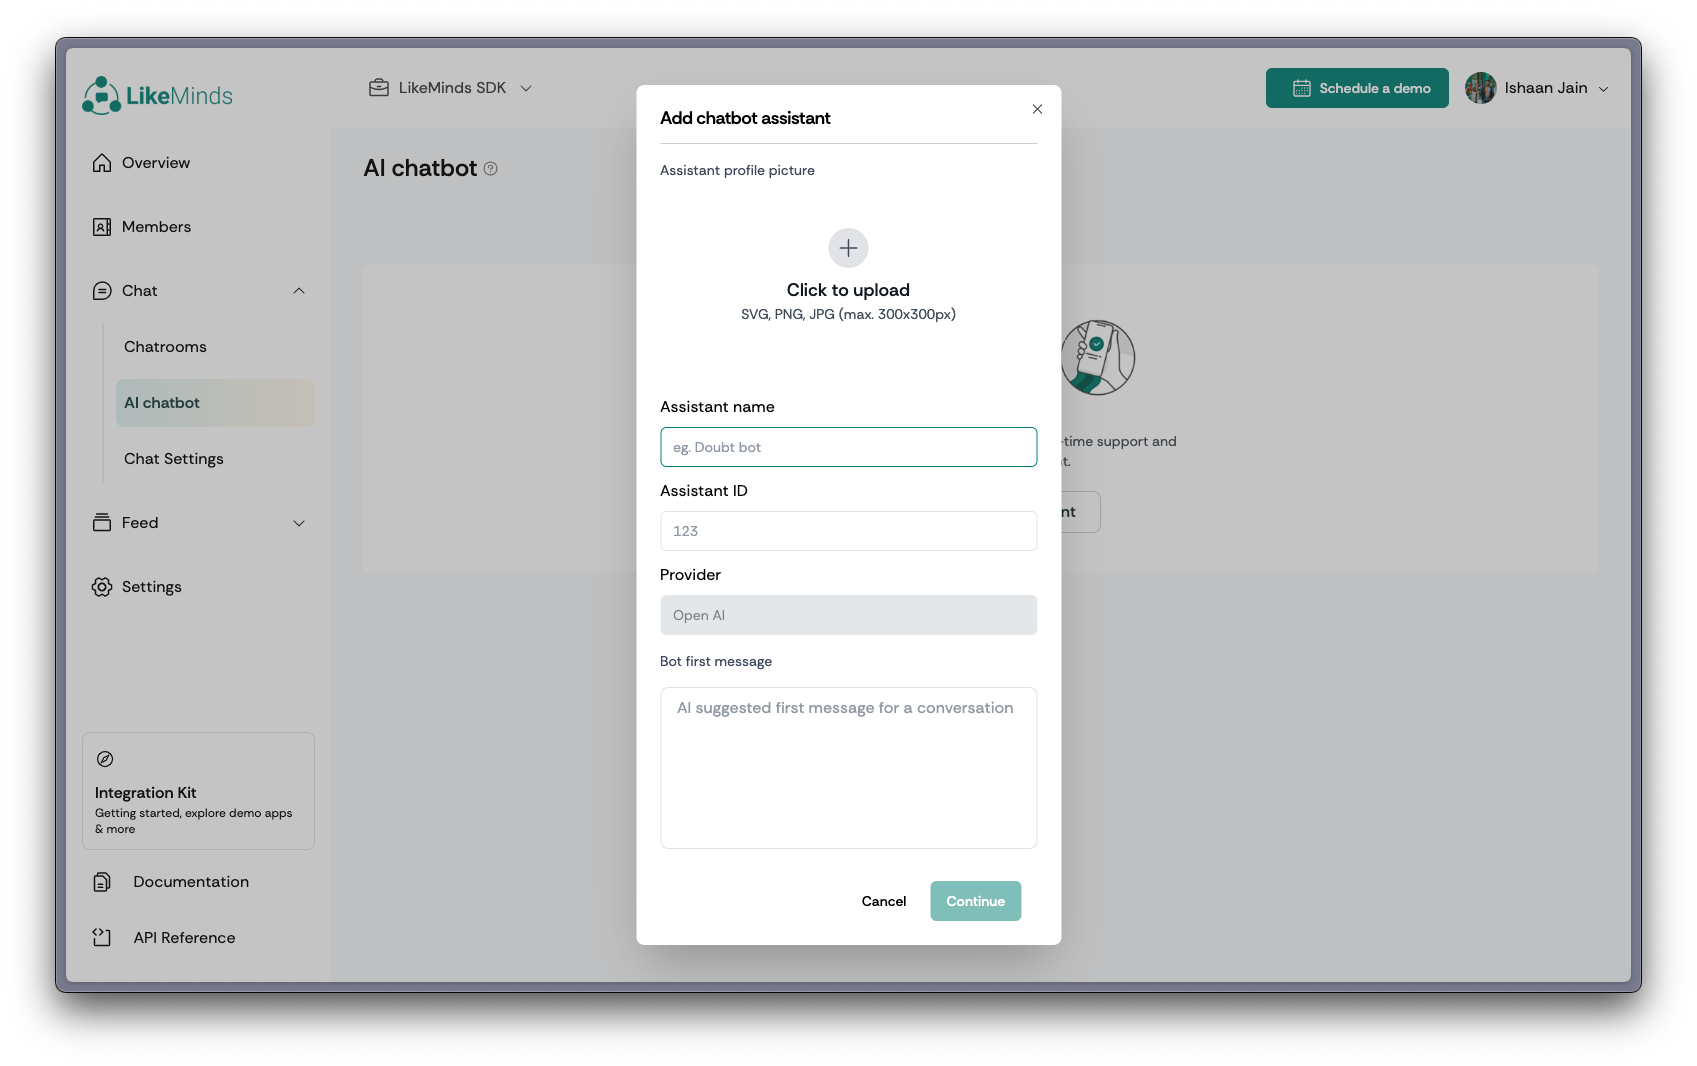
Create an Assistant: Finally, create your AI Assistant user, which will interact seamlessly with your community members.

Step 4: Integrate LikeMinds Chat SDK
To enable real-time chat functionality in your application, you will now integrate the LikeMinds Chat SDK. This SDK will allow the AI chatbot to interact with users within the chat interface, handling conversations seamlessly.
For detailed instructions on setting up the LikeMinds Chat SDK, please follow the given Getting Started with LikeMinds Chat SDK guide for the respective stack.
Once the SDK is integrated, your app will be ready to handle user interactions and AI-driven responses in the chat interface.
Conclusion
With the AI chatbot now fully integrated into the LikeMinds Chat SDK, your chat application is equipped to handle real-time, automated responses. The chatbot can assist users by answering queries, providing support, and improving engagement through seamless interactions.
By using OpenAI's assistant with the connected vector store, your chatbot can access relevant documentation to provide accurate and helpful responses. This setup reduces manual effort and creates a smoother, more dynamic user experience.
You can continue to expand the chatbot's capabilities by adding more documentation, adjusting its behavior, or tailoring it to meet specific user needs. This integration offers a powerful solution for improving your chat application's overall functionality and user satisfaction.